

How to Assemble a Partscaster Guitar: Step-by-Step
Table of Contents
- What You'll Need: Essential Parts and Components
- Partscaster Tools List: Everything You'll Need
- Step 1: Body and Neck Alignment for Your Partscaster
- Step 2: Installing Hardware and Bridge Placement
- Step 3: Wiring and Soldering Electronics
- Partscaster Neck Fit and Truss Rod Setup
- Partscaster Setup Guide: Fret Leveling and Nut Work
- Finishing Techniques for Raw Bodies
Last Updated: July 16, 2026
What You'll Need: Essential Parts and Components
A partscaster, a guitar built from individual aftermarket parts, demands careful attention to compatibility across body, neck, electronics, and hardware. The most common mistake builders make is purchasing components without verifying compatibility.
Selecting Compatible Guitar Parts
Your partscaster's success depends entirely on part compatibility. Start with the body and neck as your anchor points.
Body selection determines your instrument's weight, tonal character, and hardware mounting points. Common choices include alder (bright, punchy tone), ash (articulate, responsive), or mahogany (warm, sustaining).
Neck compatibility is non-negotiable. Measure your neck pocket carefully, most bolt-on necks use a 4-bolt or 3-bolt mounting pattern. Fender-style pockets measure 2.25 inches wide by 3.375 inches deep. Many builders source custom bodies from Haynes Guitar & Bass Build because their neck pockets are precision-routed to exact specifications.
Pickups must match your wiring configuration and tonal goals. Single-coil pickups deliver bright, articulate tone; humbucker pickups produce darker, thicker output.
Hardware compatibility includes bridge saddles, tuning machines, and the control harness. A vintage-style Telecaster bridge saddle differs significantly from a modern hardtail bridge.
Scale length affects everything downstream: fret spacing, bridge placement, string gauge compatibility, and playability. Standard Fender-style guitars use a 25.5-inch scale length; Gibson-style instruments typically use 24.75 inches.
Interactive Compatibility Checklist
- Body style selected (Stratocaster, Telecaster, Jazzmaster, etc.)
- Body wood chosen and weight verified
- Neck pocket dimensions confirmed (2.25" × 3.375" for Fender-style)
- Bolt-on neck pattern verified (4-bolt or 3-bolt mounting)
- Scale length confirmed (25.5" Fender or 24.75" Gibson)
- Pickup type selected (single-coil or humbucker)
- Pickup wiring configuration determined
- Bridge style chosen and saddle type verified
- Tuning machine style selected and headstock hole pattern confirmed
- Control harness sourced
- Nut material selected (bone or synthetic)
- String gauge range determined
- Hardware finish confirmed
Partscaster Tools List: Everything You'll Need
Building a partscaster requires specialized tools, but you don't need a full luthier workshop to succeed.
Essential hand tools include precision screwdrivers (Phillips and flathead), an adjustable wrench, hex keys for truss rod access, needle-nose pliers, and a rubber mallet. A straightedge is critical for checking neck relief and body flatness.
Measurement tools are non-negotiable. You'll need a tape measure, a feeler gauge set for checking neck relief (typically .010 inches at the 7th fret), and a multimeter to test electrical continuity in your wiring harness.
Soldering equipment forms the backbone of electronics assembly. A soldering iron rated 30-40 watts handles guitar electronics without overheating delicate components. Use 60/40 tin/lead solder, a wet natural sponge to keep your tip clean, and a desoldering pump for mistakes.
Drilling and cutting tools include a power drill with variable speed and brad-point drill bits in common sizes (3/32", 1/8", 5/32").
Finishing tools depend on your chosen finish approach. Sandpaper grits ranging from 80 to 220 prepare raw bodies. A respirator rated for organic vapors protects you during stain and sealer application.
The investment in proper tools typically ranges from $150 to $400.
Step 1: Body and Neck Alignment for Your Partscaster
The first physical step involves ensuring your body and neck marry perfectly. Misalignment at this stage compounds through every subsequent step, affecting playability and intonation.
Place your body on a flat surface with the neck pocket facing up. Inspect the pocket visually, it should be clean and free of debris. Run your straightedge across the pocket opening. Any rocking indicates a pocket that's not perfectly flat.
Checking Neck Pocket Fit and Bolt-On Neck Compatibility
Insert your neck into the pocket dry (without bolts). The fit should be snug but not forced. Measure your neck pocket depth from the body surface to the bottom, approximately 0.625 inches for most bolt-on necks. Check the neck pocket walls for perpendicularity using a small machinist's square. Even 2-3 degrees of misalignment causes significant playability problems.
Verify your bolt-on neck pattern matches your body drilling. Most Fender-style bodies use four bolt holes; Gibson-style instruments use three bolts.
Drilling Pilot Holes for Hardware
Before installing your bridge or tuning machines, drill pilot holes. These smaller-diameter holes prevent splitting and ensure screws sit perpendicular to the wood.
For bridge mounting, measure from your nut to your bridge saddle position. Standard Fender-style guitars place the bridge saddle approximately 25.5 inches from the nut. Use a 3/32-inch drill bit to create pilot holes before driving bridge mounting screws.
For tuning machine holes, the headstock typically has three holes for a three-per-side configuration or six holes for a six-in-line headstock. Use a 3/8-inch drill bit for standard tuning machine posts. Back the headstock with scrap wood to prevent tearout.
Every screw hole gets a pilot hole to prevent splitting and ensure perpendicular seating.
Step 2: Installing Hardware and Bridge Placement
With your body and neck aligned, hardware installation transforms your partscaster into a functional instrument. Bridge placement and tuning machine alignment directly affect intonation and tuning stability.
Bridge Saddles and Scale Length Verification
Your bridge saddle position determines your scale length. Place your straightedge along the fretboard, running from the nut toward the bridge. For a 25.5-inch scale length, measure 25.5 inches from the back of the nut to the front of the bridge saddle and mark this position with a pencil.
Bridge saddle height affects your action (string height above the fretboard) and tone. Standard heights range from 0.075 inches for a low, modern action to 0.125 inches for a higher, vintage-style setup.
Install your bridge carefully, ensuring all mounting screws are hand-tight before using a screwdriver. The bridge should sit flush against the body with no rocking.
Tuning Machines and String Post Installation
Tuning machines anchor your strings and determine tuning stability. Install them with the shafts perpendicular to the headstock surface.
String post height should allow approximately 2-3 wraps of string around the post before the string reaches the tuning machine's turning point. Position the tuning machines so the string posts align vertically when viewed from above. Misaligned posts create uneven string tension and poor tuning stability.
Step 3: Wiring and Soldering Electronics
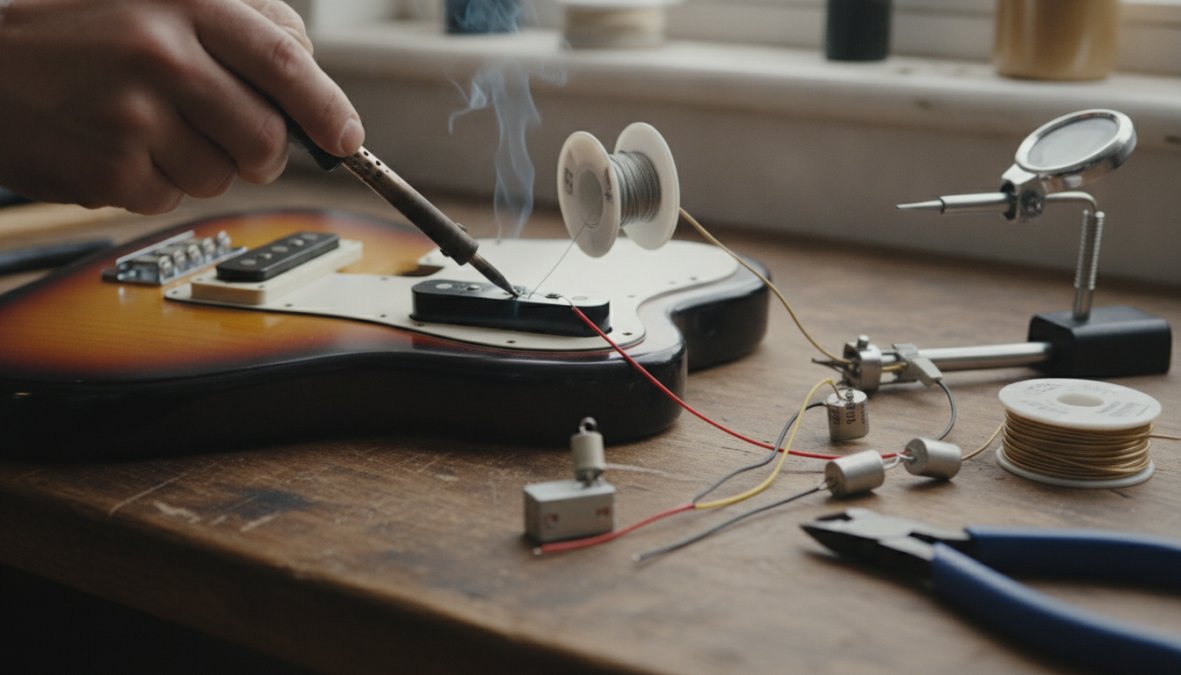
Soldering is a learnable skill that you'll use throughout your build.
Reading Your Wiring Diagram and Component Layout
Before soldering anything, study your wiring diagram completely. Most diagrams show your pickups, potentiometers (volume and tone controls), switches, and output jack with colored wires indicating connections.
Potentiometers control volume and tone. A 500K potentiometer is standard for single-coil pickups; a 250K potentiometer is typical for humbucker pickups.
Capacitors work with potentiometers to create your tone control. A 0.022 microfarad capacitor is standard for single-coil guitars; a 0.047 microfarad capacitor produces a more dramatic tone cut.
Switches determine whether pickups are active or bypassed. A three-way switch selects between neck, middle, and bridge pickups on a Stratocaster.
Many builders purchase pre-wired control harnesses from Haynes Guitar & Bass Build or similar suppliers to avoid this complexity. A pre-wired harness arrives with all connections complete and tested, dramatically reducing the chance of wiring errors.
Soldering Iron Technique and Control Harness Assembly
A quality solder joint requires three elements: heat, solder, and flux.
Heating technique: Apply your soldering iron tip to both the component lead and the pad or wire for 2-3 seconds. Only then apply solder. The solder should flow smoothly if both surfaces are hot enough.
Solder quantity: Use just enough solder to create a shiny, cone-shaped joint. Excess solder creates weak joints prone to failure.
Practice on scrap wire before soldering your actual control harness. This investment of 15 minutes prevents hours of troubleshooting later.
Grounding and Shielding Best Practices
Grounding is the single most important factor in eliminating hum and noise from your guitar's electronics. Every component must connect to a common ground point.
Ground wire typically connects from your output jack ground lug to a central point on your control harness. From there, ground connections radiate to each potentiometer case, switch casing, and pickup shield.
Shielding reduces electromagnetic interference. Wrap your control cavity with copper shielding tape or aluminum foil, connecting the shielding to your ground point.
Test your grounding with a multimeter before final assembly. Set your multimeter to the resistance setting and test continuity from your output jack to each potentiometer case, switch casing, and pickup shield. All should read near zero ohms.
Partscaster Neck Fit and Truss Rod Setup
With your electronics complete, return to your neck. The truss rod is a metal rod running through your neck that counteracts string tension and controls neck relief.
Testing Neck Pocket Alignment and Relief
Insert your neck into the body and install all bolts finger-tight. Don't fully tighten yet.
Place your straightedge on the frets, running from the first fret toward the 24th fret. A tiny gap (approximately 0.010 inches) is ideal. This gap allows strings to vibrate without buzzing while maintaining playability.
Adjust your truss rod to achieve the correct relief. The truss rod nut is typically located at the headstock (Fender-style) or at the body end (Gibson-style). A quarter-turn adjustment typically changes relief by 0.010 inches.
Tightening the truss rod (turning clockwise) reduces relief, flattening your neck. Loosening the truss rod (turning counterclockwise) increases relief, adding forward curve. Make adjustments in quarter-turn increments and wait 15 minutes between adjustments to allow the wood to settle.
Adjusting Truss Rod for Proper Action
Once you've achieved correct relief, your action is determined by your nut height and bridge saddle height.
Measure your action at the 7th fret. Standard action measures approximately 0.080 inches on the bass side and 0.070 inches on the treble side for modern electric guitars.
If your action is too high, your nut is too tall. If it's too low, your strings buzz against frets. Many builders prefer purchasing pre-slotted bone nuts rather than attempting nut adjustment.
Fully tighten your neck bolts once you've achieved correct relief and action.
Partscaster Setup Guide: Fret Leveling and Nut Work
Fret leveling is where many partscaster builds separate from factory instruments. A properly leveled fretboard feels smooth and plays effortlessly.
Fret Leveling and Dressing Techniques
Fret leveling requires a straightedge and sandpaper. Place your straightedge across multiple frets, checking for high spots. Mark your frets with a pencil and sand with 220-grit sandpaper, using long strokes along the entire fretboard. Your goal is to sand enough to remove the pencil marks from every fret crown.
Fret dressing follows leveling. Use progressively finer grits (320, 400, 600) to restore the fret crown. The entire process typically takes 2-4 hours depending on your fretboard's initial condition.
Nut Slotting and Bone Nut Adjustment
Your nut determines the height of your strings at the headstock. Nut slot depth should allow strings to rest approximately 0.020-0.030 inches above the first fret when no strings are pressed. Nut slot width must match your string gauge.
Most builders purchase pre-slotted bone nuts rather than attempting this specialized work. A bone nut costs $15-30 and eliminates the risk of ruining your nut.
Intonation Setup and Bridge Saddle Compensation
Intonation is the accuracy of your notes across the fretboard. Perfect intonation means the 12th fret harmonic matches the fretted 12th fret note exactly.
Tune your open strings to pitch using a tuner. Play the 12th fret harmonic on your low E string and compare it to the fretted 12th fret note. If the fretted note is sharp, your bridge saddle is too close to the nut. If it's flat, your saddle is too far away.
Adjusting bridge saddles is your primary intonation control. Most bridges feature saddle position adjustments via screws at the bridge base. Make adjustments in small increments, typically 1/16-inch turns.
| Setup Stage | Typical Time | Impact on Playability |
|---|---|---|
| Neck relief adjustment | 30 minutes | Critical, prevents fret buzz |
| Fret leveling and dressing | 2-4 hours | Eliminates dead spots and buzzing |
| Nut slot verification | 15 minutes | Prevents string binding and buzz |
| Bridge saddle intonation | 30 minutes | Ensures pitch accuracy across fretboard |
| Action measurement and adjustment | 20 minutes | Determines playability comfort |
Finishing Techniques for Raw Bodies
Your raw body arrives unfinished, ready for stain, sealer, and clear coat. Finishing transforms raw wood into a professional-looking instrument while protecting the wood from moisture and damage.
Stain, Sealer, and Clear Coat Application
Preparation is critical. Sand your body with 220-grit sandpaper, removing any dust and creating a smooth surface. Wipe with a tack cloth to remove all sanding dust.
Wood stain adds color and enhances grain visibility. Water-based stains dry quickly; oil-based stains offer richer color but require longer drying times. Apply stain with a foam brush or cloth, working in the direction of the grain. Allow 24 hours drying time.
Sealer stabilizes the wood and prevents stain from bleeding through subsequent coats. Apply one thin coat with a foam roller and allow 24 hours drying time.
Clear coat protects your finish and adds gloss or satin sheen. Polyurethane is durable and widely available. Apply multiple thin coats rather than one thick coat. Three to five clear coats provide adequate protection.
Hardware Installation After Finishing
Once your finish is fully cured (typically 48-72 hours), install your hardware. Use painter's tape to protect finished areas from scratches. Install your bridge, tuning machines, strap buttons, and output jack carefully.
Your partscaster is now complete. The final step involves a complete setup: tuning, intonation verification, action measurement, and any final adjustments. The investment in proper assembly technique, quality tools, and careful adjustment creates an instrument that rivals factory guitars in playability and tone. Haynes Guitar & Bass Build offers custom bodies and necks designed for exactly this purpose, with precision-routed neck pockets and hand-selected tonewoods that eliminate compatibility guesswork.
Frequently Asked Questions
What parts do I need to build a partscaster guitar?
A complete partscaster requires a body, bolt-on neck, pickups, bridge with saddles, tuning machines, control harness (potentiometer and switches), wiring diagram components, bone nut, and hardware. Ensure scale length compatibility between neck and body. Our custom bodies like the Stratocaster or Telecaster styles (£240) pair well with quality necks. Verify neck pocket dimensions match your chosen body before purchasing.
What tools are needed for partscaster assembly?
Essential tools include a soldering iron, multimeter for testing circuits, radius gauge for checking fret work, pilot hole drill bits, screwdrivers, Allen keys, and a truss rod wrench. Luthier tools like fret crowning files and nut slotting files are needed for setup. A straightedge helps verify neck relief and body flatness. Quality tools ensure precision, poor-quality drills can strip neck pockets or body cavities, ruining your build.
How do I ensure proper partscaster neck fit and alignment?
Check that your bolt-on neck's pocket dimensions match your body's neck pocket exactly. Test fit before drilling pilot holes. The neck should sit flush with no gaps. Use a straightedge along the frets to verify neck relief matches your body contour. Poor alignment causes action problems and intonation issues. Our custom bodies feature precisely routed neck pockets to ensure reliable compatibility with standard bolt-on necks.
Do I need soldering experience to wire a partscaster?
Basic soldering skills are essential. Use a soldering iron (25-40W) with a clean tip. Solder connections to potentiometers, pickup leads, and ground points on your control harness. A multimeter tests continuity before assembly. Poor solder joints cause crackling, noise, and intermittent pickups. Practice on spare wire first. Follow your wiring diagram precisely, shielding and grounding prevent hum and ensure clean signal from your pickups.
This article was written using GrandRanker