

How to Build Custom Bass Guitar: Complete Step-by-Step Guide
Table of Contents
- Planning and Design: Foundation for Your Custom Bass Build
- Best Wood for Bass Guitar Body and Neck Construction
- Essential Bass Guitar Building Tools and Workshop Setup
- Body Shaping, Routing, and Hardware Assembly
- How to Wire a Bass Guitar: Electronics and Active Systems
- Finishing Your Build: Sanding Sealer and Nitrocellulose Lacquer
- DIY Bass Guitar Kit vs Scratch Build: Which Approach Is Right?
- Common Build Failures and Troubleshooting Your Custom Bass
How to Build Custom Bass Guitar: Complete Step-by-Step Guide
Last Updated: July 14, 2026
Learning how to build custom bass guitar is one of the most rewarding projects a musician can undertake. At Haynes Guitar & Bass Build, we've guided countless builders through creating instruments tailored to their exact specifications. The difference between a great custom bass and a mediocre one comes down to precision in five critical areas: planning, material selection, tool mastery, assembly technique, and finishing.
Planning and Design: Foundation for Your Custom Bass Build
Your design decisions determine whether your bass will be playable or a wall ornament. Start by defining your purpose: are you building a five-string or four-string? Jazz bass, precision bass, or hybrid? Each choice cascades into material decisions, hardware requirements, and electronics complexity.
Defining Scale Length and Body Dimensions
Scale length is the vibrating length of strings, measured from nut to bridge. Most four-string basses use 34 inches (standard) or 32 inches (short scale). Five-strings typically run 35 inches. Scale length directly affects string tension, playability, and tone. A longer scale produces higher tension and brighter tone; a shorter scale feels easier on your hands but produces slightly less sustain.
Body dimensions should reflect your scale length. A typical jazz bass body measures roughly 19 inches long and 8.5 inches wide, with thickness ranging from 1.5 to 1.75 inches. Document your chosen dimensions before touching wood.
Selecting Your Neck Profile and Fretboard Radius
Neck profile describes the cross-sectional shape: C-shape (comfortable for most players), U-shape (more mass and stability), or V-shape (rare on basses). Fretboard radius describes the curve across the fretboard width. A 7.25-inch radius feels curved (vintage vibe); a 12-inch radius feels flatter (modern). Most custom basses use 9.5 to 12 inches. Document both decisions before your neck blank arrives.
Best Wood for Bass Guitar Body and Neck Construction
Tonewood selection affects both sound and workability. For body wood, ash and alder remain industry standards. Ash produces bright, punchy tone with good sustain and machines cleanly. Alder produces warmer tone and is slightly easier to work with. Mahogany offers warm tone and excellent workability. Exotic woods offer visual appeal but rarely improve tone and are harder to machine.
For neck wood, hard maple is nearly universal because it's stable, dense, and machines predictably. Maple necks resist warping and hold frets securely. A stable neck that stays straight matters infinitely more than chasing tone through exotic materials.
Neck Pocket Preparation and Fit
The neck pocket must be precise, a loose pocket means the neck will shift under string tension, destroying intonation. Your neck pocket should be a tight mechanical fit, not glued. The pocket depth should match your neck tenon length exactly, typically 1.5 to 2 inches. The width should match your neck width at the body joint with no more than 0.5mm total tolerance.
Route your pocket using a template and router with a straight bit. Test fit your neck multiple times before final assembly. It should slide in smoothly and sit flush with zero gaps.
Essential Bass Guitar Building Tools and Workshop Setup
You don't need a fully equipped luthier shop, but you do need the right tools for specific tasks.
CNC vs Manual Routing and Template Use
A CNC router produces perfect body and pocket routing every time. For a single build, CNC costs roughly $200-400 to outsource. Manual routing with a template requires skill but works perfectly well. A plunge router with a straight bit, quality template, and careful setup produce professional results. Many builders use a hybrid approach: outsource body and pocket routing to a CNC service, then handle finishing and detail work themselves.
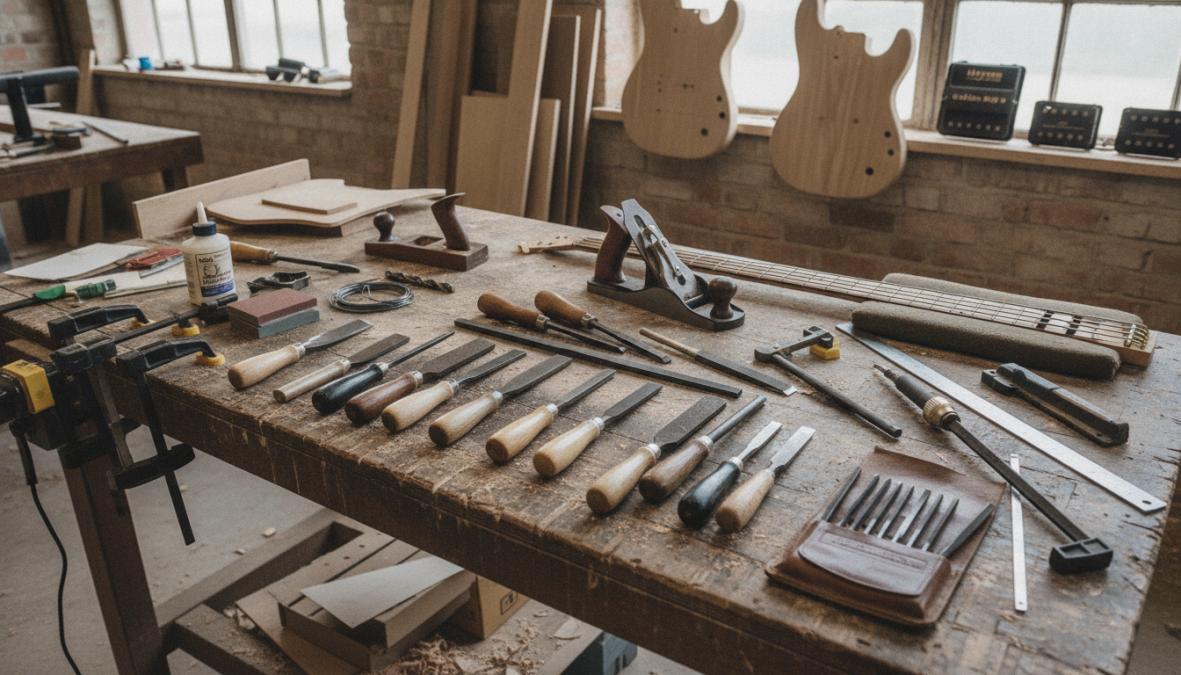
Sanding, Crowning, and Finishing Equipment
Fret crowning requires a crowning file, a specialized tool that shapes each fret to the correct profile. This takes roughly 1-2 hours per bass. Alternatively, many builders send necks to a professional fretter, which costs $150-300 but guarantees perfect frets.
Sanding requires progressively finer grits: start at 80-grit for body shaping, move to 150-grit for smoothing, then 220-grit for final prep. Budget 8-12 hours for thorough sanding.
For finishing, a basic HVLP (high-volume, low-pressure) spray gun costs $80-150. Alternatively, brush-on polyurethane finishes work and require no special equipment. Essential hand tools include chisels, files, measuring tape, calipers, straightedge, and clamps. You'll also need soldering equipment: a 30-40 watt soldering iron, solder, and a wet sponge.
Body Shaping, Routing, and Hardware Assembly
Bridge Assembly and Intonation Setup
Your bridge holds strings at the correct height while anchoring them to the body. A typical bridge mounts with four screws and includes individual bridge saddles for each string. Each saddle has an intonation screw that moves it forward or backward to adjust string length and intonation.
Install your bridge after finishing but before stringing. The bridge height should position strings roughly 2mm above the fretboard at the 12th fret. Intonation adjustment happens after the bass is fully strung and the neck is truss-rod adjusted. Play the harmonic at the 12th fret, then play the fretted note. If the fretted note is sharp, move the saddle back. If it's flat, move it forward.
Tuning Machines and Hardware Installation
Quality tuning machines make a measurable difference in tuning stability. Four-string basses typically use either two-on-a-side or four-in-a-row configurations. Five-strings usually run three-on-a-side plus two-in-a-row. Install machines after your headstock is shaped and drilled.
Drill pilot holes carefully, oversized holes mean loose machines. Machines should sit flush against the headstock with no gaps.
Install a nut before final assembly. The nut spaces the strings and transfers vibration from strings to the headstock. The nut slot depth should position strings roughly 1.5mm above the first fret when the bass is strung at pitch.
How to Wire a Bass Guitar: Electronics and Active Systems
Electronics work intimidates many builders, but the fundamentals are straightforward. Most bass electronics involve pickups, a preamp (if active), potentiometers for volume and tone control, and an output jack.
Pickup Selection, Preamp Integration, and Soldering Basics
Pickups are the heart of your bass's tone. Passive pickups are simpler but have higher output impedance. Active pickups include a preamp that boosts signal and cleans up tone, but require a 9V battery. For a beginner build, passive pickups are simpler. The Haynes Golden Root 62 Jazz Bass Pickups deliver 1960s-inspired tone with excellent clarity and warmth at a reasonable price point.
Soldering is the skill that makes electronics work. A 30-watt soldering iron heats components to roughly 350°C. Heat the joint for 2-3 seconds, then touch solder to the hot joint, not the iron. The solder should flow smoothly around the connection, creating a shiny cone shape. Practice on scrap wire before touching your actual electronics.
Wiring Harness, Potentiometers, and Output Jack Installation
A wiring harness is the complete assembly of wires, potentiometers, switches, and jacks that control your bass's tone and volume. Most basses use a simple harness: one volume pot, one tone pot, and an output jack.
A 250K pot is standard for bass. Install pots into a control plate or cavity, then solder wires to the three lugs on each pot. A stereo jack includes a switch that disconnects the battery when no cable is inserted. Wire your harness before installing it in the bass. The basic wiring path: pickups → volume pot → tone pot → output jack. Ground all components to a common ground wire.
Shielding and Grounding for Noise-Free Performance
Copper shielding tape lines the pickup cavities and electronics cavity, creating a Faraday cage that blocks external noise. Proper grounding is critical for noise-free operation. All ground connections should tie to a single point, typically the output jack ground lug. Run a ground wire from each pickup's shield, each pot's casing, and the bridge ground to this central point.
Finishing Your Build: Sanding Sealer and Nitrocellulose Lacquer
Start with sanding sealer, a thin, quick-drying primer that seals the wood grain. Apply 2-3 coats, sanding lightly between coats with 220-grit paper.
Nitrocellulose lacquer is the traditional bass finish, it's thin, dries quickly, and can be buffed to a high gloss. Apply 8-12 thin coats, sanding between every 2-3 coats with 320-grit paper. Polyurethane is an alternative that's more durable but produces a thicker, less resonant finish.
After your final coat cures (24-48 hours), sand the entire bass with 400-grit paper to dull the gloss, then buff with steel wool for a satin finish.
DIY Bass Guitar Kit vs Scratch Build: Which Approach Is Right?
A kit includes pre-routed body, finished neck, and all hardware, you assemble and finish. A scratch build starts with raw wood blanks and requires all routing, shaping, and finishing.
Kits reduce complexity and cost. A quality kit runs $300-600, while a scratch build costs $500-800 in materials alone. Kits eliminate routing mistakes and let beginners focus on assembly and finishing. The downside: kit bodies are standardized, limiting customization.
For your first build, a kit makes sense. You'll learn assembly, electronics, and finishing without routing complexity. For your second build, you'll be ready for scratch building.
Common Build Failures and Troubleshooting Your Custom Bass
Action Height, String Gauge, and Playability Issues
Action height, the distance from strings to fretboard, affects playability and tone. Ideal action sits around 2mm at the 12th fret for the treble strings, slightly higher for the bass strings. Adjust action by shimming the neck pocket or adjusting the bridge height.
String gauge affects tension and tone. Heavier strings (0.105-0.045) produce more tone and sustain but require higher action. Lighter strings (0.095-0.040) feel easier to play but produce less tone. Most builders start with 0.105-0.045 and adjust based on preference.
If your bass feels uncomfortable, action is usually the culprit. Measure your action at the 1st fret, 7th fret, and 12th fret. The measurements should increase gradually.
Fret Crowning, Truss Rod Adjustment, and Nut Slot Problems
Fret crowning shapes each fret to the correct profile. Professional fretting costs $150-300 but guarantees perfect results. The truss rod adjusts neck relief, the slight forward bow that prevents fret buzz. Adjust in quarter-turn increments, then wait 30 minutes for the neck to settle.
Nut slot problems cause buzzing or muted strings. If a string buzzes, the nut slot is too low. If a string sounds muted, the slot is too high. Nut slots are difficult to repair, you'll likely need a new nut.
| Common Problem | Root Cause | Solution |
|---|---|---|
| String buzz at low frets | Low nut slots or high frets | Replace nut or crown frets |
| Buzzing throughout neck | Insufficient neck relief | Loosen truss rod slightly |
| Dead spots at certain frets | Uneven fret heights | Crown and level all frets |
| High action that won't lower | Neck pocket too deep | Shim the neck pocket |
| Intonation won't adjust | Bridge saddles stuck | Clean saddle slots and retest |
Building a custom bass guitar demands patience, precision, and willingness to learn from mistakes. The process takes 40-80 hours from blank to playable instrument, but the result is an instrument tailored exactly to your specifications and playing style.
If you're sourcing hand-wound pickups for your build, the Haynes Golden Root 62 Jazz Bass Pickups deliver the warm, expressive tone that defined 1960s bass music. These pickups integrate seamlessly into active or passive electronics and are specifically designed for the nuanced tonal control that serious bass players demand.
Frequently Asked Questions
What tools do I need to build a custom bass guitar?
Essential tools include a router with jigs and templates, chisels, hand planes, clamps, fret crowning files, and finishing equipment. For body shaping, you'll need either CNC routing capabilities or manual routing tools. Soldering iron, multimeter, and wiring tools are critical for electronics. Many builders use both power tools and hand tools depending on the precision required for each stage of construction.
Is it hard to build your own bass guitar from scratch?
Building a custom bass guitar requires patience and precision but is achievable for dedicated makers. The most challenging aspects are neck pocket fitting, fret crowning, and electronics wiring. Success depends on investing in quality tools, understanding tonewood properties, and carefully following measurements for scale length and intonation. Most builders recommend starting with a kit before attempting a full scratch build to learn fundamentals.
How much does it cost to build a custom bass guitar?
A DIY scratch build typically costs £1,500-£3,500+ depending on tonewood quality, hardware, and pickup choice. Hand-wound pickups like the Haynes Golden Root 62 Jazz Bass Pickups (£105) are a worthwhile investment for tone. Body blanks, hardware, electronics, and finishing materials add significant cost. Kit builds cost less upfront but offer less customization. Professional-grade tools represent the largest initial investment for most builders.
Should I buy a bass kit or build a custom bass guitar from scratch?
Kits suit beginners, they include pre-routed bodies and necks, reducing tool investment and complexity. Scratch builds offer complete control over tonewood, scale length, neck profile, and ergonomic design, allowing true customization. Kits teach assembly and electronics faster; scratch builds teach luthier skills. If you want a truly bespoke instrument tailored to your playing style and tone preferences, scratch building is worth the time and investment.
How long does it take to build a custom bass guitar?
A scratch build typically takes 80-200+ hours spread over weeks or months, depending on your experience and available workshop time. Kit builds complete faster, usually 20-40 hours. Time varies based on finishing complexity, electronics integration, and your familiarity with tools. Most builders work on projects gradually rather than continuously, allowing glue, stain, and lacquer to cure properly between stages.
What are the most important parts of a bass guitar build?
Neck pocket fit and truss rod alignment are critical, poor fit affects playability and stability. Tonewood choice directly influences tone and sustain. Quality pickups and preamp electronics determine your sound character; hand-wound pickups offer superior tone over mass-produced options. Bridge assembly and intonation setup ensure the bass plays in tune across all frets. Proper shielding and grounding eliminate unwanted noise in active systems.
This article was written using GrandRanker