

Common Guitar Building Mistakes: A Complete Guide
Table of Contents
- Common Guitar Building Mistakes: A Complete Guide
- Incorrect Wood Selection and Grain Orientation
- Improper Measurements, Cutting, and Jig Template Accuracy
- Neck Pocket and Bolt-On Neck Assembly Errors
- Essential Luthier Tools and Proper Tool Selection
- Guitar Neck Alignment Tips and Truss Rod Setup
- Finishing a Guitar Body Mistakes and Glue Application Errors
- Guitar Setup and Intonation Guide: Bridge Placement and Action
Last Updated: July 13, 2026
Building a guitar from scratch is rewarding but fraught with pitfalls. This guide breaks down the critical errors that derail first-time builders and provides actionable solutions. Understanding these common mistakes will save you countless hours of rework and frustration.
The difference between a playable instrument and a frustrating one often comes down to precision during the build phase. Many builders discover mistakes only after finishing, when correcting them becomes exponentially harder. By identifying errors early, you'll avoid costly material waste and the demoralizing experience of sanding through a finish to fix a preventable problem.
Incorrect Wood Selection and Grain Orientation
Wood selection directly impacts tone, stability, and the instrument's ability to hold its shape through seasonal humidity changes. Wood expands and contracts across the grain far more than along it. A neck with grain running side-to-side instead of lengthwise will develop a permanent twist that no truss rod adjustment can fully correct.
For guitar bodies, quarter-sawn or rift-sawn wood is superior to flat-sawn because it minimizes cupping and warping. For necks, straight grain running the entire length is non-negotiable. Any grain runout creates a weak point that will snap under string tension.
Common wood selection mistakes include using softwoods for structural components (hardwoods like mahogany, maple, and ash are required for durability), ignoring wood movement (figured maple moves more than plain maple), mixing incompatible wood species (they move at different rates and joints will eventually open), and overlooking wood defects like knots or grain runout that compromise structural integrity.
Improper Measurements, Cutting, and Jig Template Accuracy
Measurement errors compound through every subsequent step. A 2mm error in scale length becomes a 4mm error in bridge placement. Precision demands accurate measuring tools, properly constructed jigs and templates, and methodical verification at each step.
Scale length, the distance from the nut to the bridge saddle, drives intonation, string tension, and playability. A 1mm error creates measurable intonation problems at the 12th fret. To set scale length correctly: measure from the nut's center to the bridge saddle's center with a precision ruler or caliper, verify the measurement three times using different tools, and mark bridge placement with a sharp pencil or knife line.
Common measurement errors include using worn or inaccurate measuring tools (invest in quality calipers and a precision straightedge), cutting without a template for repeated components (even a simple plywood template ensures consistency), misaligning jigs during setup (a jig that's 3 degrees off-angle produces a skewed neck pocket), and trusting eye alignment instead of mechanical verification (use a straightedge and feeler gauges, not visual inspection).
Neck Pocket and Bolt-On Neck Assembly Errors
The neck pocket is the foundation of bolt-on neck assembly. A poor fit cascades into playability problems affecting the entire instrument. The pocket must be dimensionally accurate, properly aligned, and finished smooth enough to allow the neck to seat fully without rocking or twisting.
The pocket should be slightly larger than the tenon, typically 0.5mm to 1mm of clearance on each side. This allows the neck to seat without forcing, yet tight enough to prevent movement. The neck pocket must be perfectly square to the body's centerline and parallel to the body surface. Use a straightedge across the pocket opening to verify it's flat and a machinist's square to verify it's perpendicular to the body centerline.
Before final assembly, perform a dry fit: insert the neck without glue, check that it sits flush with no rocking, verify the headstock angle is correct, ensure the neck can be removed and reinserted smoothly, and check that the pocket's depth allows full seating while leaving room for bolt holes.
Common errors include routing a pocket that's too deep (the neck sits too far back, creating excessive headstock angle), creating an undersized pocket (forces the neck in, compressing wood unevenly), misaligning the pocket to the body centerline (the neck will sit crooked), assembling without a dry fit (dry fitting reveals problems before glue makes them permanent), and using too much glue (prevents the neck from seating fully).
Essential Luthier Tools and Proper Tool Selection
Building a guitar demands precision tools. The right tools aren't always the most expensive; they're designed specifically for the task.
Essential measuring tools include digital calipers (0-150mm range) for measuring neck pocket dimensions and tenon thickness, a straightedge (at least 600mm) for checking neck twist and body flatness, a precision level for verifying jig alignment, and feeler gauges for checking neck relief.
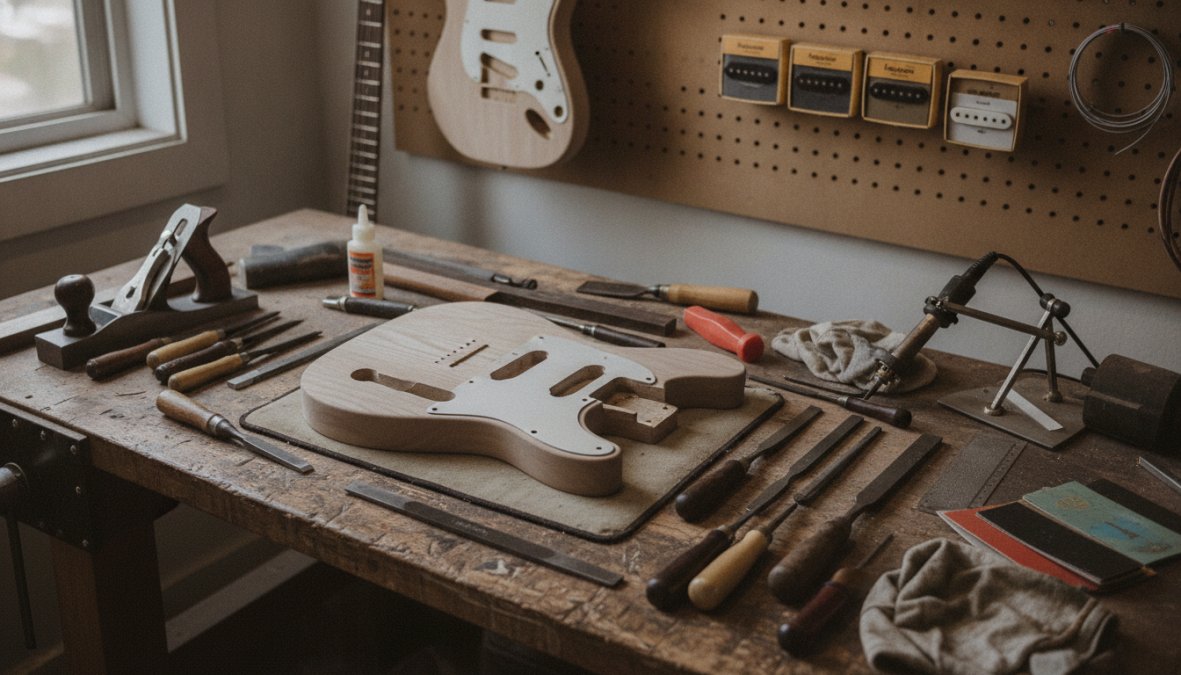
Cutting tools must be sharp and appropriate: a sabre saw or band saw for body contours, chisels (1/4", 1/2", 3/4", 1") for cleaning routed areas, a router with straight bits for neck pockets, and a fret saw for nut slot cutting.
Shaping tools include a block plane for final neck shaping, a spokeshave for contouring edges, and sandpaper in grits from 80 to 2000.
Assembly tools include 4-6 bar clamps (24-36" length), quality screwdrivers and bits, a hex key set, and a soldering iron with temperature control.
Safety is non-negotiable: eye protection when using power tools, a dust mask or respirator when sanding, hearing protection for loud tools, work gloves for handling rough wood, and a first aid kit nearby.
Poor tool selection manifests as using dull saws requiring excessive force, attempting to route without a template, using clamps that apply uneven pressure, and skipping safety equipment.
Guitar Neck Alignment Tips and Truss Rod Setup
Neck alignment is the single most critical factor in playability. A misaligned neck cannot be corrected by bridge adjustment alone. The neck must be straight laterally (no twist) and have the correct amount of forward bow to accommodate string vibration.
Checking neck alignment requires a straightedge placed along the frets from headstock to body. A neck with proper relief shows a gap of approximately 0.5-1mm at the 7th-9th frets.
To check and adjust neck relief: place a straightedge along the frets, look for gaps in the middle of the neck, loosen the truss rod slightly (1/4 turn) if there's no gap, tighten it slightly if the gap exceeds 1mm, wait 15 minutes for the wood to settle before rechecking, and never make large adjustments.
Common mistakes include over-tightening the truss rod (which pulls the headstock too far forward, creating a back-bow), installing the neck at the wrong angle (the pocket must be routed so the neck sits at the correct angle), failing to account for truss rod installation depth (it must be accessible without interfering with headstock shape), and not understanding that truss rod adjustment is iterative (the neck continues to settle for weeks).
Finishing a Guitar Body Mistakes and Glue Application Errors
Glue application errors are the most common finishing-related problem. Wood glue is unforgiving; once it sets, removing it without damaging the wood is nearly impossible.
The correct glue application process is: apply a thin, even bead along joint surfaces, use a glue brush to spread evenly, assemble and apply clamp pressure (the glue should squeeze out slightly), wipe away excess glue immediately with a damp cloth, and allow 24 hours for full cure.
Common glue errors include using too much glue (creates a mess and interferes with fit), using old or improperly stored glue (it degrades over time), applying glue to only one surface (both surfaces should be coated), and not clamping with enough pressure (insufficient pressure leaves voids).
Sanding progression is critical. Each grit removes scratches from the previous one. Proper progression is: 80-120 grit for initial shaping, 150-180 grit for final shaping, 220 grit for final body preparation, 320-400 grit between finish coats, and 600-1000 grit for final sanding.
Lacquer application requires a dust-free environment, multiple thin coats rather than one thick coat, proper spray technique (6-8 inches from the surface in smooth overlapping passes), adequate drying time between coats, and sanding between coats to improve adhesion.
Common finishing mistakes include spraying in a dusty environment (dust settles on wet finish), applying thick coats that run and sag, not sanding between coats (the final finish will be softer), and finishing before the wood is fully prepared (clean thoroughly with a tack cloth before applying finish).
Guitar Setup and Intonation Guide: Bridge Placement and Action
Setup is the final step in guitar building. Bridge placement determines intonation; the bridge saddle must be positioned so the distance from the nut to the saddle equals the scale length. A bridge placed 1mm too far back makes the guitar sharp; 1mm too far forward makes it flat.
To verify bridge placement: measure the scale length with a precision ruler, fret the low E string at the 12th fret and measure the distance to the bridge saddle (this should equal half the scale length), and adjust the bridge in small increments (0.5mm at a time).
Action is the height of strings above the fretboard. Ideal targets are: electric guitars 1.5-2mm at the 12th fret on the treble side and 2-2.5mm on the bass side; acoustic guitars 2-2.5mm on the treble side and 2.5-3mm on the bass side.
Proper nut slot depth is: treble strings 0.5-0.7mm below the fret height at the first fret, and bass strings 0.7-0.9mm below.
Common setup mistakes include placing the bridge without measuring (visual placement is inaccurate), setting action too high to avoid fret buzz (this masks the real problem), cutting nut slots too deep (kills tone and response), and ignoring fretboard radius during action setup (a tight radius requires higher action at the ends).
| Setup Parameter | Electric Guitar | Acoustic Guitar | Measurement Method |
|---|---|---|---|
| Action at 12th fret (bass) | 2-2.5mm | 2.5-3mm | Feeler gauge under string |
| Action at 12th fret (treble) | 1.5-2mm | 2-2.5mm | Feeler gauge under string |
| Nut slot depth (bass) | 0.7-0.9mm | 0.8-1mm | Feeler gauge in slot |
| Nut slot depth (treble) | 0.5-0.7mm | 0.6-0.8mm | Feeler gauge in slot |
| Scale length accuracy | ±1mm | ±1mm | Precision ruler, nut to bridge |
Plan to revisit setup after the first 2-4 weeks of playing as wood settles. Common post-build issues include fret buzz (loosen the truss rod slightly), action rising over time (check neck relief and bridge position), intonation drifting (verify bridge position and saddle condition), and dead tone (nut slots may be too deep).
Building a guitar that plays beautifully and stays in tune requires attention to detail at every stage. The common guitar building mistakes outlined here are preventable with proper planning, accurate tools, and patience. If you're ready to move beyond the learning curve and want a custom instrument built to your exact specifications, the Custom Stratocaster Body from Haynes Guitar & Bass Build offers precision components designed for builders who demand consistency. With hand-selected wood and pre-routed options available, you'll spend less time on preparation and more time on the craft. Check out the custom body options and start your next build with components built for success.
Frequently Asked Questions
What are the most common mistakes in guitar building?
The most common guitar building mistakes include incorrect wood selection, improper measurements and cutting, faulty neck alignment, inadequate bracing, and poor finish application. Wood grain orientation affects both tone and structural stability. Measurement errors compound throughout assembly. Neck pocket alignment directly impacts playability and intonation. Many builders also underestimate the importance of proper clamping during glue-up and humidity control during finishing. Addressing these early prevents costly rework.
How do you avoid mistakes when building a guitar?
Start with proper planning: use accurate jigs and templates for scale length and neck pocket dimensions. Invest in essential luthier tools, calipers, straight edges, and quality clamps. Follow the 'measure twice, cut once' principle religiously. Always perform a dry fit before applying wood glue. Control humidity during building and finishing. Use a visual diagnostic checklist before assembly to catch grain orientation and wood defects. Take time with each step rather than rushing; most mistakes stem from skipped steps or inadequate surface preparation.
What tools do I need for guitar building?
Essential luthier tools include: a sabre saw or band saw for body cutting, chisels for neck pocket routing, calipers and straightedges for measurements, quality clamps for glue-up, sanders (belt and orbital), a router for pickup cavities, soldering iron for electronics, and measuring gauges for nut slot depth and action. You'll also need wood glue, finish (lacquer or polyurethane), and safety equipment. Quality tools reduce errors and improve precision. Starting with a basic kit and adding specialized tools as your skills develop is a practical approach.
How do you check guitar neck alignment?
Neck alignment starts with ensuring the neck pocket is cut accurately using proper jigs and templates. Dry fit the neck into the pocket and check for gaps or rocking. Use a straightedge along the fretboard to verify the neck isn't twisted. Check that the bolt-on neck sits flush with the body. After assembly, sight down the fretboard from the headstock to detect any misalignment. Truss rod adjustment comes later during setup, but structural alignment must be correct during building. Misalignment at this stage cannot be fully corrected later.
What is the hardest part of building a guitar?
The hardest part varies by builder, but most find neck pocket routing and achieving proper intonation setup most challenging. Neck pocket alignment requires precision, errors here affect playability permanently. Finishing a guitar body without dust, runs, or uneven lacquer application demands patience and environmental control. Bridge placement for accurate intonation requires understanding scale length compensation. Electronics soldering and wiring harness integration intimidate many builders. However, with proper jigs, templates, and a systematic approach, each challenge becomes manageable. Budget-specific builders often struggle most with material selection and tool investment.
How long does it take to build a custom guitar?
A complete custom guitar build typically takes 4-8 weeks for an experienced luthier, depending on complexity and finish type. Hand-wound pickup installation and custom body specifications add time. Lacquer finishing alone requires days of curing between coats. Humidity control during building extends timelines in certain seasons. Beginners should expect 2-3 months for their first build. Custom orders from professional builders like Haynes Guitar & Bass Build account for design consultation and material sourcing. Rushing any phase, especially glue-up, finish curing, or setup, compromises final quality.
What finishing mistakes are most common in guitar building?
Common finishing errors include inadequate sanding between coats, applying lacquer in poor humidity conditions (causing crazing or cloudiness), uneven application leading to runs or drips, and insufficient curing time between coats. Many builders skip proper surface preparation, resulting in dust nibs in the finish. Humidity control is critical, apply finish in 45-55% relative humidity. Use proper spray technique and thin coats rather than one thick coat. Allow full curing (often 7-14 days for lacquer) before final assembly. Budget-conscious builders often cut corners here; professional finishes justify the time investment.
How do you set up guitar intonation after building?
Intonation setup begins with accurate bridge placement during building, the bridge saddle position determines compensation for scale length. After assembly, measure the open string pitch and fretted pitch at the 12th fret using a tuner. If sharp, the bridge saddle needs to move back slightly; if flat, move it forward. Nut slot depth also affects intonation, slots that are too deep cause tuning instability. Check action height and radius to ensure proper string contact. This is part of the final guitar setup and intonation guide phase and should be done after the instrument has stabilized in its environment for several days.
This article was written using GrandRanker