

How to Finish Guitar Body Wood: Step-by-Step Guide
Table of Contents
- Preparing Your Guitar Body: Surface Preparation and Sanding
- Grain Filling and Sealing: Building Your Foundation
- Staining and Dyeing Your Guitar Body Wood
- Guitar Body Finishing Tools and Equipment You'll Need
- Nitrocellulose vs Polyurethane Guitar Finish: Which to Choose
-
Applying Topcoat and Colour Coat Layers
- [Viscosity and Thinning for Even Application](#viscosity and-thinning-for-even-application)
- Avoiding Orange Peel and Blushing Defects
- How Long to Let Guitar Finish Cure: Curing Times and Patience
- Leveling, Wet Sanding, and Final Finishing How to Finish Guitar Body Wood
Last Updated: August 4, 2026
How to finish guitar body wood is one of the most critical stages of any custom build, separating a professional-looking instrument from an amateur one. Mastering these techniques will transform your instrument from raw timber into something that sounds as good as it looks. The finishing process protects the wood, affects how the instrument resonates, and determines whether your guitar will age gracefully or deteriorate over time.
Preparing Your Guitar Body: Surface Preparation and Sanding
The foundation of any great finish is meticulous surface preparation. No amount of topcoat will hide imperfections in the wood beneath.
Start with a thorough timber inspection. Look for knots, grain runout, dents, or areas where the wood grain raises in opposing directions. Run your hand across the body in different directions to feel high spots and valleys. Mark problem areas with a pencil.
The grit progression is non-negotiable. Begin with 80-grit to remove machine marks, then move to 120-grit, 150-grit, and finally 180-grit or 220-grit depending on your wood type. Each step removes scratches from the previous grit. Use a random orbital sander for flat areas and a sanding block for edges and curves. Sand with the grain whenever possible. Between each grit, wipe the body with a tack cloth to remove all dust.
Grain Filling and Sealing: Building Your Foundation
Open-grain woods like ash, mahogany, and walnut have visible pores that will telegraph through your finish if left unfilled. For ash bodies, a grain filler paste applied perpendicular to the grain, then scraped back, works well. Water-based grain fillers are easier to apply and clean up, though they require longer drying times for dense woods.
Alternatively, use a sanding sealer, a thin lacquer or polyurethane that seals the wood without filling pores. Apply in thin, even coats with a spray gun or foam brush. Two coats usually suffice. Sand lightly between coats with 320-grit to remove nibs or dust particles.
The sanding sealer serves two purposes: it seals the wood so stain or dye absorbs evenly, and it provides a stable base for subsequent coats. Allow sanding sealer to cure fully, typically 4-8 hours depending on the product and humidity. Cold, damp conditions slow curing dramatically. If your workshop is below 15°C or above 80% humidity, your sealer will cure slowly and may not harden properly.
Staining and Dyeing Your Guitar Body Wood
Choosing between wood dye and stain is a fundamental decision that affects both the final appearance and the build timeline.
Wood dye penetrates deep into the wood grain, creating rich, transparent colours that highlight the wood's natural figure. Alcohol-soluble dyes dry quickly (30 minutes to 1 hour) and produce vibrant results, but they're prone to uneven absorption if your sealing step wasn't thorough. Water-based dyes dry more slowly (2-4 hours) and are easier to control, but they raise the wood grain slightly, requiring a light sand with 320-grit after drying.
For a sunburst or gradient effect, dye is your best option. Mix your dye to the desired strength and apply it in coats, building colour gradually. Apply with a foam brush, sponge, or spray gun. Allow dye to cure fully before applying your sealer topcoat, typically 12-24 hours.
Guitar Body Finishing Tools and Equipment You'll Need
A gravity-feed HVLP (high-volume, low-pressure) spray gun is the standard choice for guitar finishing. These guns atomize finish into fine particles, allowing you to apply thin, even coats that level smoothly.
Your spray gun must be clean before every use. Dried lacquer or polyurethane inside the nozzle will cause spitting and uneven spray patterns. Disassemble the gun after each session, soak the parts in lacquer thinner (if using nitrocellulose) or appropriate solvent for your topcoat, then blow out all solvent with compressed air.
Masking is critical to protect areas you don't want coated. Use quality painter's tape and plastic sheeting to cover the neck pocket, bridge area, and any hardware holes. Compressed air must be clean and dry. Water in your air line will cause blushing (a white, cloudy appearance) in your finish. Use an air filter with a water trap, and drain the compressor tank regularly.
A tack cloth removes dust particles from the wood surface before spraying. Wipe the body gently with the tack cloth immediately before each spray session.
Nitrocellulose vs Polyurethane Guitar Finish: Which to Choose
Nitrocellulose lacquer is the traditional choice for high-end guitars. It's thin, flexible, and creates a warm, natural appearance. The finish ages beautifully, developing a patina and subtle checking (fine cracks) that many consider character rather than damage. The downside is durability. Nitrocellulose scratches easily and is vulnerable to heat, moisture, and UV exposure. It requires regular maintenance and will show wear within a few years of heavy playing.
Polyurethane finishes are significantly more durable. They resist scratching, moisture, and UV damage far better than nitrocellulose. A polyurethane finish will look new for years with minimal maintenance. The trade-off is feel and tone perception. Polyurethane is thicker and less flexible than nitro, which some players feel dampens the instrument's natural resonance.
Water-based finishes offer a middle ground: lower VOC (volatile organic compound) emissions, moderate durability, and a natural appearance. They're environmentally friendlier and safer to apply in small spaces. However, they're more sensitive to humidity during application and curing.
For a partscaster build where cost and durability matter, polyurethane makes sense. For a showcase instrument where tone and aesthetics are paramount, nitrocellulose is the traditional choice. According to UK Environmental Protection Agency guidance on solvent emissions, water-based finishes significantly reduce workplace exposure to hazardous compounds compared to traditional lacquers.
Applying Topcoat and Colour Coat Layers
Once your sealer is dry and your body is dusted with the tack cloth, you're ready for colour coats. The goal is to apply thin, even layers that build colour gradually without running or sagging.
Viscosity and thinning are critical. Your finish should flow smoothly from the spray gun without running. Most manufacturers recommend thinning to a specific viscosity. As a rule of thumb, thin your finish until it flows smoothly from the spray gun with a consistent, fine mist.
Apply colour coats in thin layers, building up gradually. Three to five thin coats typically produces better results than one or two heavy coats. Allow each coat to flash off (become tacky but not fully dry) before applying the next. Flash-off time typically ranges from 15-30 minutes.
Avoiding orange peel and blushing defects requires attention to application technique and environmental conditions. Orange peel, a bumpy texture resembling orange skin, usually results from finish drying too quickly before levelling smoothly. Reduce air pressure slightly and increase the distance between the gun and the body (typically 20-25 cm).
Blushing is a white, cloudy appearance caused by moisture trapped in the finish. This occurs when you spray in humid conditions or when moisture is present in your compressed air. Use an air filter with a water trap, and avoid spraying when humidity exceeds 70%.
How Long to Let Guitar Finish Cure: Curing Times and Patience
This is where many builders fail. They finish spraying and immediately start sanding or reassembling the guitar. Premature sanding or assembly will wreck your finish.
Between coats, allow adequate flash-off time. This is when the finish becomes tacky but not fully hardened. Flash-off typically takes 15-30 minutes. You can apply the next coat once the finish is tacky.
Full cure is different. This is when the finish has hardened completely and developed its final hardness and durability. Nitrocellulose typically requires 48-72 hours of full cure before sanding or assembly. Polyurethane requires 5-7 days. Water-based finishes vary but generally need 3-5 days.
Temperature and humidity dramatically affect cure time. Cold temperatures slow curing. High humidity also slows curing and can cause blushing or soft spots. If your workshop is cold or damp, plan for extended cure times. A consistent 20-25°C with 40-60% humidity is ideal for most finishes.
Don't trust the feel of the finish as a guide to cure. Lacquer can feel hard to the touch within 24 hours but still be soft underneath. Full cure requires time.
Leveling, Wet Sanding, and Final Finishing How to Finish Guitar Body Wood
Once your topcoats are fully cured, you're ready for the final finishing steps that transform a good finish into an excellent one.
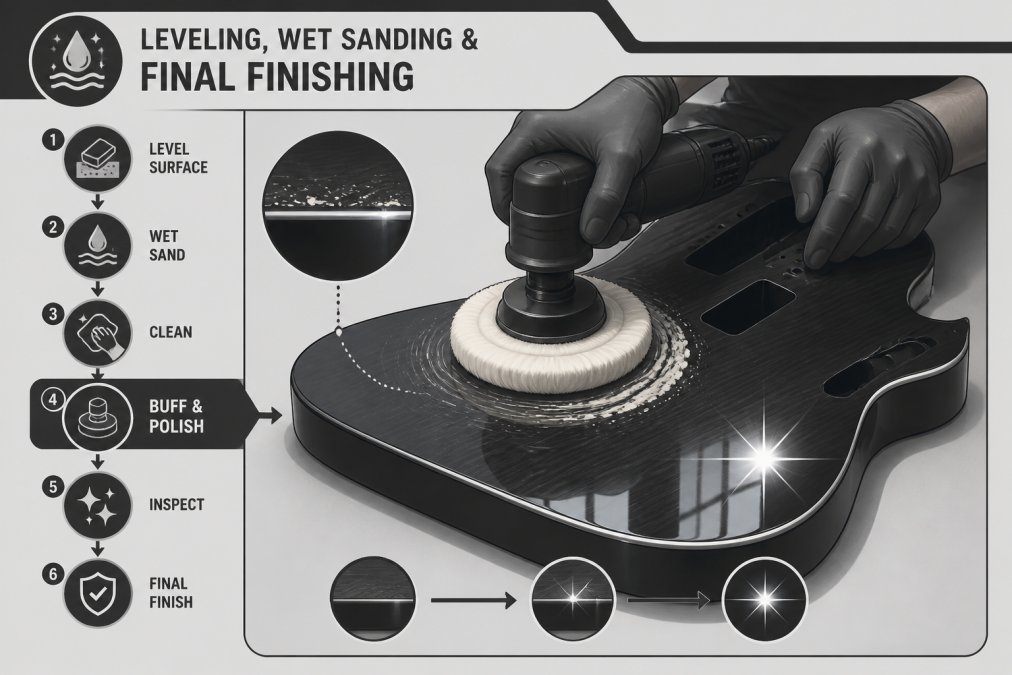
Wet sanding is the process of sanding the cured finish with fine-grit paper and water as a lubricant. This removes dust nibs, orange peel texture, and minor imperfections while creating a smooth, even surface. Use 400-grit wet/dry sandpaper and a sanding block, sanding gently with the grain. The water keeps dust from becoming airborne and cools the finish.
Wet sand until the entire surface has a uniform dull appearance. This typically requires 15-30 minutes of careful work. Wipe the body frequently with a damp cloth to see your progress. If you sand through the topcoat in any area, stop immediately and spray a thin coat of finish to cover the bare area, allow it to cure, then resume wet sanding.
After wet sanding, rinse the body thoroughly with clean water and allow it to dry completely.
Buffing and polishing brings the finish to its final sheen. For a satin finish, you're done after wet sanding. For a high gloss finish, use a buffing compound and a soft buffing wheel (foam or lambswool) on an electric drill or dedicated buffer. Apply buffing compound sparingly to the wheel, not directly to the guitar. Work in small sections, moving the buffer in slow, circular motions. Light pressure is essential, excessive pressure generates heat and can damage the finish.
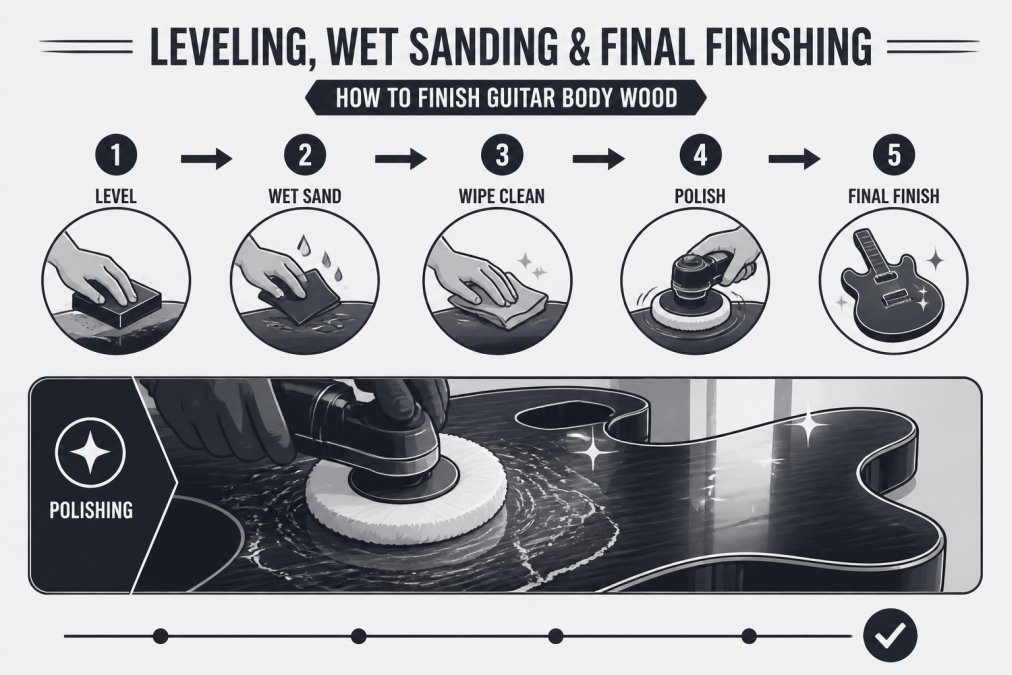
Remove all buffing compound residue with a soft, lint-free cloth.
| Finishing Stage | Duration | Key Points |
|---|---|---|
| Surface Preparation (80-220 grit) | 4-6 hours | Sand with grain, use tack cloth between grits |
| Grain Filling/Sealing | 4-8 hours | Allow full cure before colour coat |
| Staining/Dyeing | 12-24 hours | Use sealer coat before topcoat to prevent bleeding |
| Colour Coats (3-5 thin layers) | 2-4 hours application | Flash-off 15-30 minutes between coats |
| Full Cure Before Sanding | 48-72 hours (nitro) / 5-7 days (poly) | Temperature and humidity affect cure time |
| Wet Sanding | 15-30 minutes | Use 400-grit, light pressure, sand with grain |
| Buffing/Polishing | 20-30 minutes | Light pressure, circular motions, remove compound residue |
The entire process from raw wood to finished instrument typically takes 2-3 weeks when accounting for cure times between stages. Common mistakes include rushing between coats, applying topcoat before sealer is fully cured, spraying in humid conditions, and sanding before the finish is fully hardened.
If you're building in the UK during winter months, plan for significantly extended cure times. Cold workshops (below 15°C) will double or triple your curing periods. Consider using a space heater to maintain 18-22°C during application and curing.
For budget-conscious builders, water-based finishes offer a cost-effective alternative to traditional nitrocellulose while reducing ventilation requirements and VOC exposure.
Finishing a guitar body properly separates a custom build from an assembly job. The process demands patience, attention to detail, and respect for the materials involved. If you're sourcing a custom body for your partscaster, Haynes Guitar & Bass Build offers precision-routed bodies in alder, ash, and mahogany, each prepared to exacting standards and ready for finishing. Whether you choose a [Stratocaster(/products/custom-stratocaster-body-built-to-your-spec) body design | haynesguitarandbassbuild.com/products/custom-stratocaster-body-built-to-your-spec], Telecaster, or Jazzmaster configuration, starting with a properly prepared blank gives your finish the best foundation. Begin your custom build today and take your instrument from concept to completion.
Frequently Asked Questions
What is the best way to prepare wood before finishing a guitar body?
Start with timber inspection to identify defects, cracks, or grain irregularities. Sand progressively through grits: 80, 120, 150, 180, and finish with 220 grit. Use a tack cloth between each grit to remove dust. This grit progression ensures a smooth surface that accepts stain and sealer evenly. Always sand with the grain to avoid cross-grain scratches that will show through the final finish.
What's the difference between nitrocellulose lacquer and polyurethane for guitar finishing?
Nitrocellulose lacquer dries quickly, is easy to repair, and is traditionally favoured for tone, but offers less durability and contains higher VOCs. Polyurethane provides superior scratch and moisture resistance, lasts longer, and is more environmentally friendly in water-based formulations, but is harder to repair and may slightly dampen resonance. Choose nitrocellulose for vintage aesthetics and repairability; choose polyurethane for durability and low-VOC requirements.
What guitar body finishing tools do I actually need to start, and can I use budget options?
Essential tools include sanding blocks, grits 80-220, a tack cloth, spray equipment (HVLP sprayer or aerosol), grain filler, sealer, stain or dye, topcoat (lacquer or polyurethane), wet-sanding pads (400-1000 grit), buffing compound, and a buffing wheel. Budget options work: foam sanding blocks cost £5-10, HVLP sprayers start at £40-60, and compound buffing pads under £15. Focus spending on quality sealer and topcoat rather than tools; cheap finish materials show in the result.
This article was written using GrandRanker